
Many of you have asked for Farmhouse Kitchen's homemade bread recipe, so here it is! This is my standard sandwich bread, dinner rolls and with a wee bit of adjusting it becomes our pizza crust recipe. I make this bread often, honestly it's nothing fancy. This is a great recipe for smart beginners to enjoy the learning curve of baking fresh bread. This bread should be consumed within a couple of days to keep its peak flavor and texture.
Baking bread is a bit easier if you have a mixer. However I baked bread and homemade pizzas for years without a mixer, so don't let the lack of a mixer keep you from trying to bake bread.
Bread Baking Mindset
Baking simple breads at home isn't hard, but it does take time. If you're ready to try your hand at baking bread I really encourage you to check out some of the many wonderful bread baking books from your local library. Read through them like you would read
a novel, it really helps you understand the chemistry side of bread baking. Reading through the notes and specific bread science lessons was very valuable to me in the early days.
There's a bit of a learning curve on figuring out how best to fit baking bread into your lifestyle.
You need to get to know what makes your new friend thrive!
Bread likes warmth. The little things like the temperature of the water that receivies the sleeping yeast, the temperature of your flour, and the temperature of the room where the dough rises are all important. Warmth = Happiness for your dough.
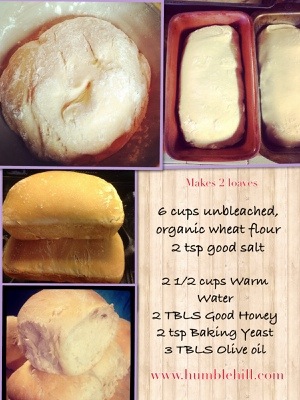
Makes 2 loaves
Simple recipe is:
Dry Ingredients Mix:
6 cups of unbleached, organic wheat flour other wise known as white flour
2 tsp good quality salt
Wet Ingredients Mix:
2 Tbls good quality honey
2 1/2 cups of warm water
2 tsp baking yeast
2 TBLS olive oil or organic canola oil
The Process:
I begin with setting up the wet ingredients first.
The recipe calls for 2 1/2 cups of warm water. Temperature is very important. Think very warm bathtub water, not scalding, but your wrist/finger isn't staying in super long. It's hot – 114degrees is ideal. I usually heat up a bit over 1 cup of water in a small sauce pan bringing it almost to a boil. Then I add this very hot water to a glass measuring cup, add the honey, mix and dissolve.Then add the rest of the water – about a cup and a half of cold to balance it out and it will make 2 1/2 cups of warm water that feels like the right temperature. Over time this temperature alchemy will become second nature.
Once the water is just right you will add 2 tsp active baking yeast to this warm, sweet mixture. The yeast is awakened by the warm water and it feeds off the honey. In ten minutes it will become a frothy, foamy slurry. Only mix this mixture when you first add the yeast, let it do its thing after the initial add & stirring.
Wait to add the oil that is one wet ingredient that gets added later .
Once you have your wet ingredients mixed, set them aside and let the yeast awaken. Next measure out the dry ingredients, grease the pans, and find the clean linens you'll need to cover the rising dough.
Get your bread hook attachment hooked up, add your dry ingredients to the mixers bowl and raise the bowl into place. Double check that your splash guard and funnel are lined up correctly, make sure your bowl is snapped into place and turn the mixer on.
I add the frothy yeast mixture to the running mixer and then quickly add my oil right as the dough is forming.
If you don't have a mixer
Simply measure out the dry ingredients into a large bowl, mix them together and then hollow out a hole in the center of the flour. Add your wet ingredients to this crater and slowly with a fork begin to incorporate the flour along the rim of your crater. As you do this the wet area expands eventually coming together as a nice ball of dough.
The dough shouldn't be too wet or too stiff and dry. This is one of those things you just get used to over time the more you bake.
Keep some extra flour near by to fix the consistency if needed.
Place the dough in a bowl, cover with a clean linen and set it in a warm place to rise. If you have a wood stove be careful not to put it too close to the stove, this will dry out the dough and accelerate rising.
Let it rise till doubled in size (about 90 minutes)
.
Shaping the Loaves
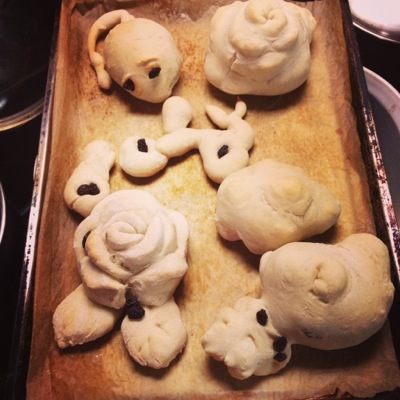
Dough likes to be handled very gently, divide it in half and shape each one into a loaf.
I hold the dough in the air as I shape the loaves. I mould the dough into a long rectangle and then roll it upward. I pinch the bottom seam and do the same for each end and tuck it under the loaf to make a pretty shaped loaf and place it in a greased bread pan.
Repeat for the next loaf and then let the dough rise again, covering the pans with a linen towel for about 30 minutes till they look really nice and fluffy.
Place them into a preheated 350 degree oven and bake for about 45 min.
As soon as you can handle them, remove the loaves from the pans to cool otherwise they will sweat in the pans as they cool.
The larger version Makes 3 loaves or 2 loaves & 12 small rolls or 6 large ones
Simple recipe is:
Dry Ingredients Mix:
9 cups of unbleached, organic wheat flour other wise known as white flour
1 TBL good quality salt
Wet Ingredients Mix:
3 TBLS good quality honey
3 3/4 cups of warm water
1TBL baking yeast
4 TBLS olive oil or organic canola oil
Strategic Kitchen Tip
If you hope to have some bread on hand for the following day try to time your baking so the hot bread isn't ready when everyone is super hungry!
Have fun with it and be sure to comment below and share your success!